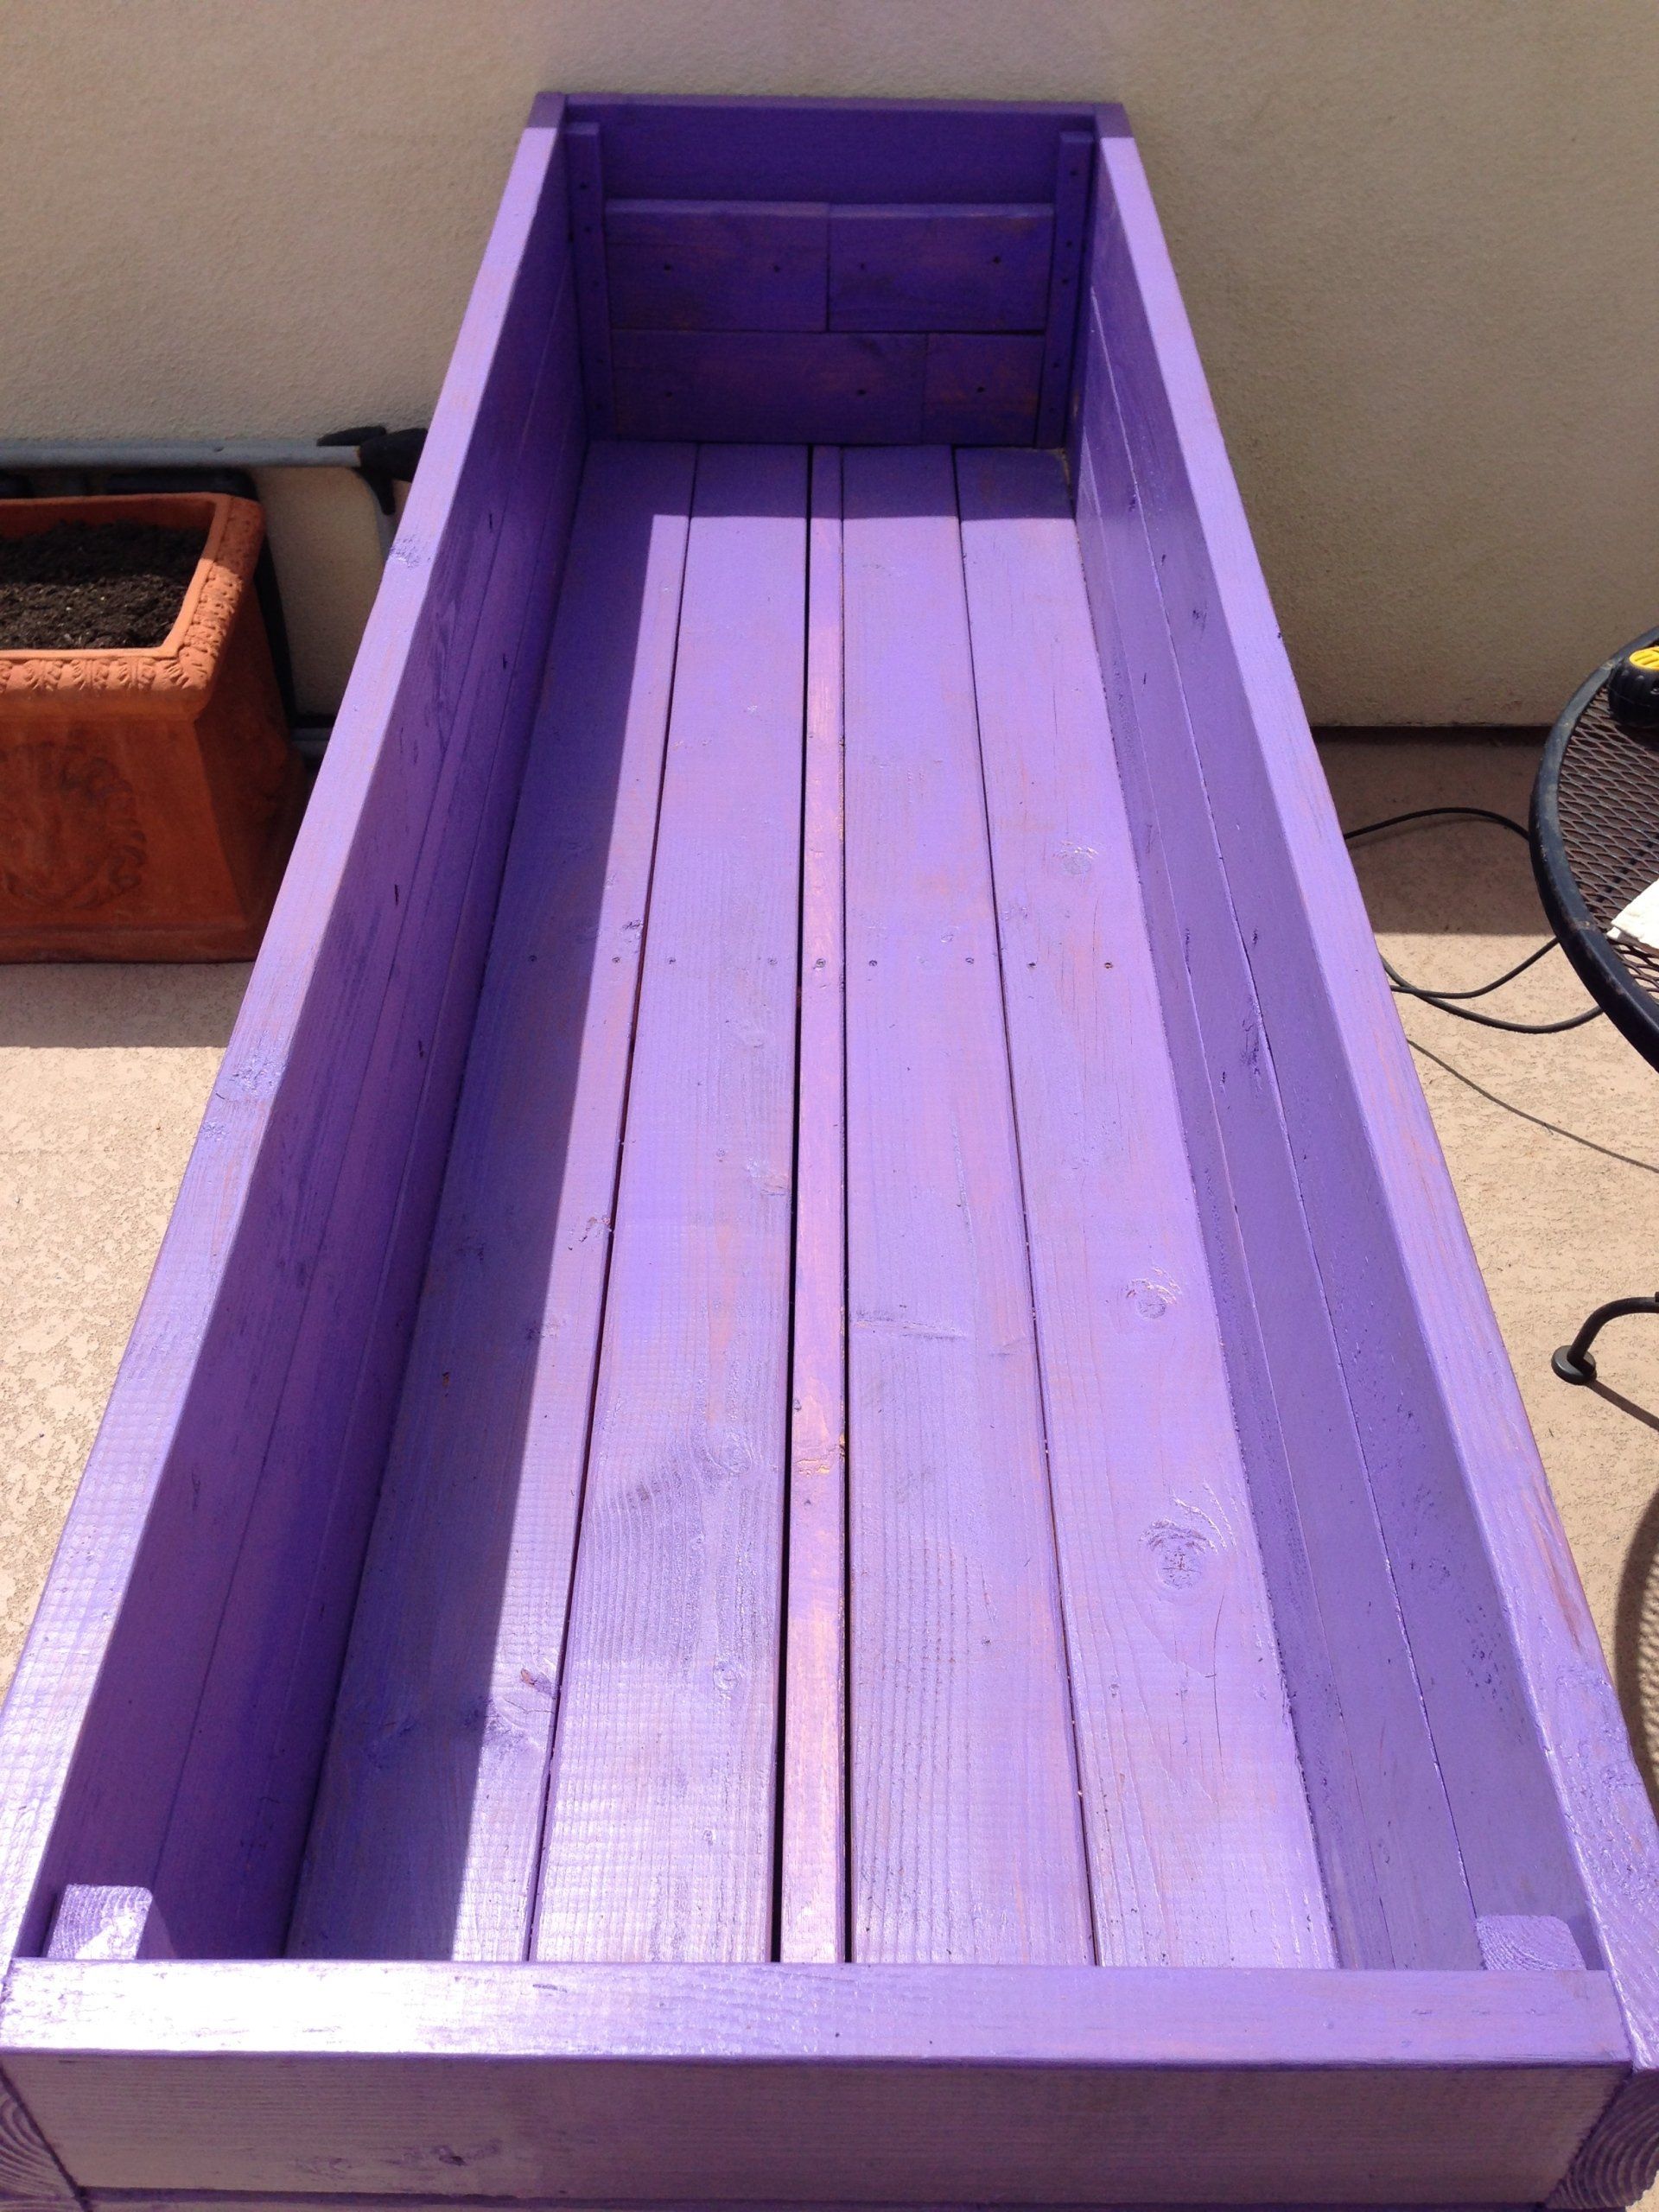
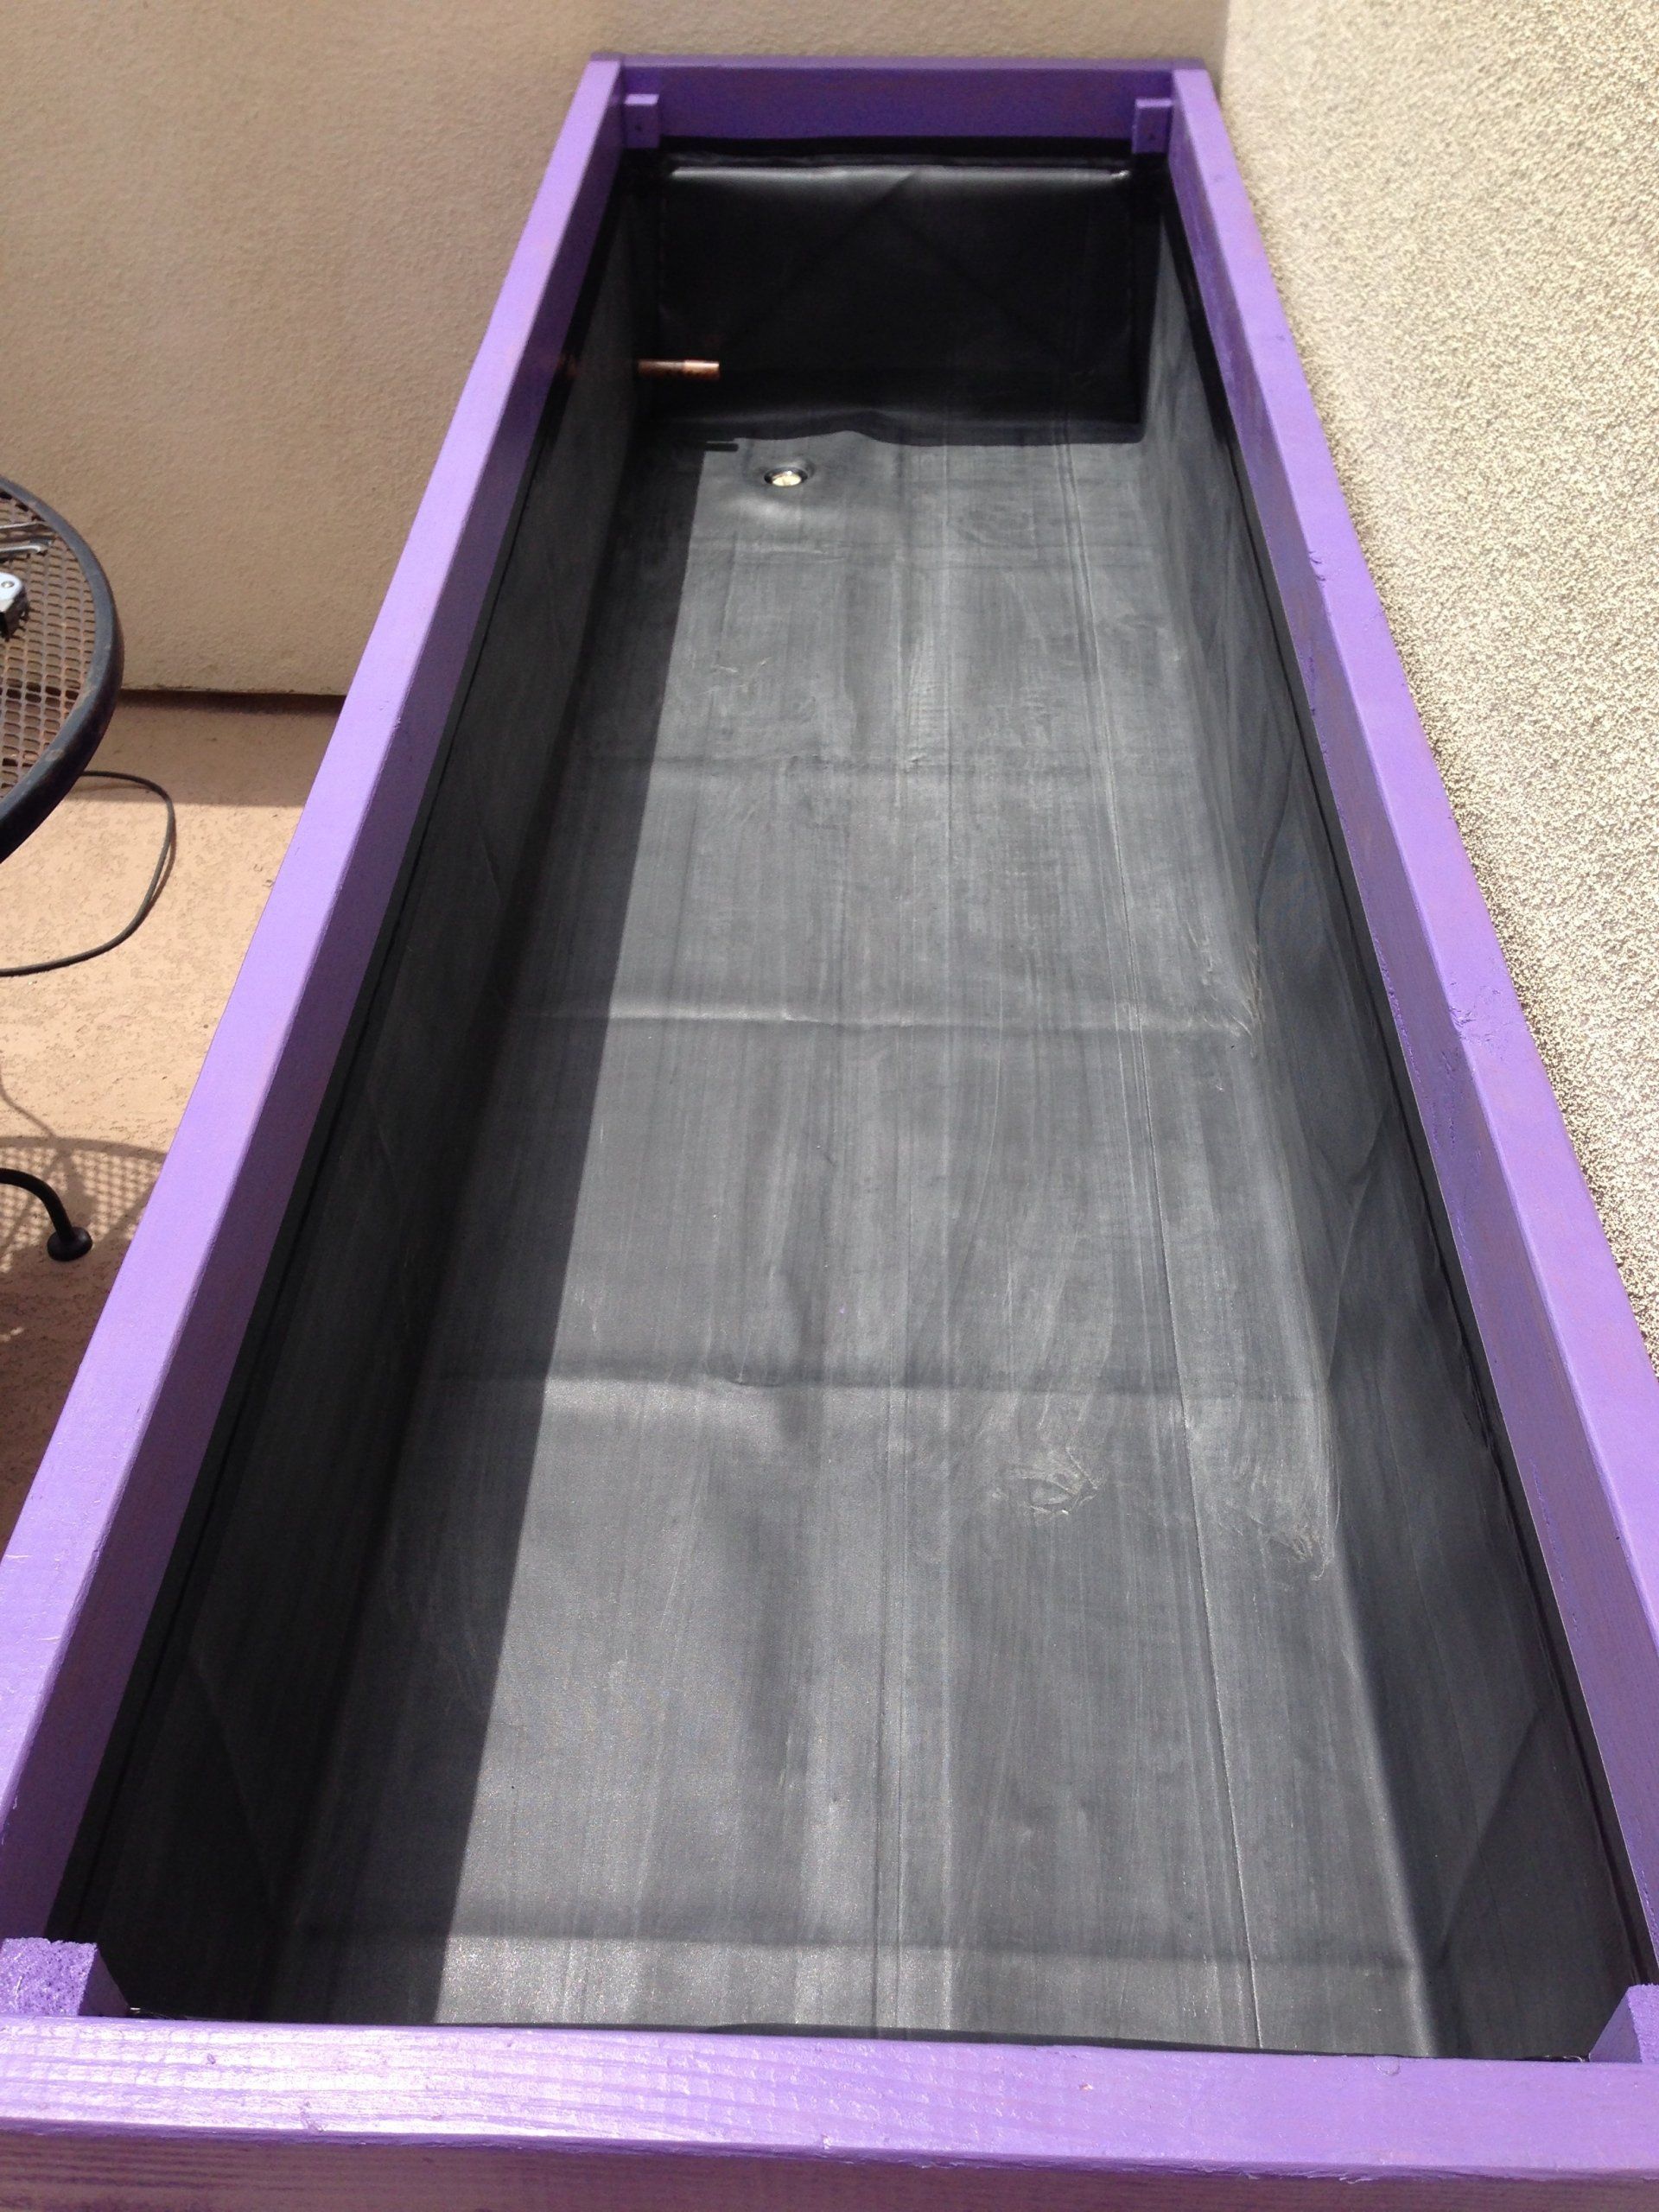
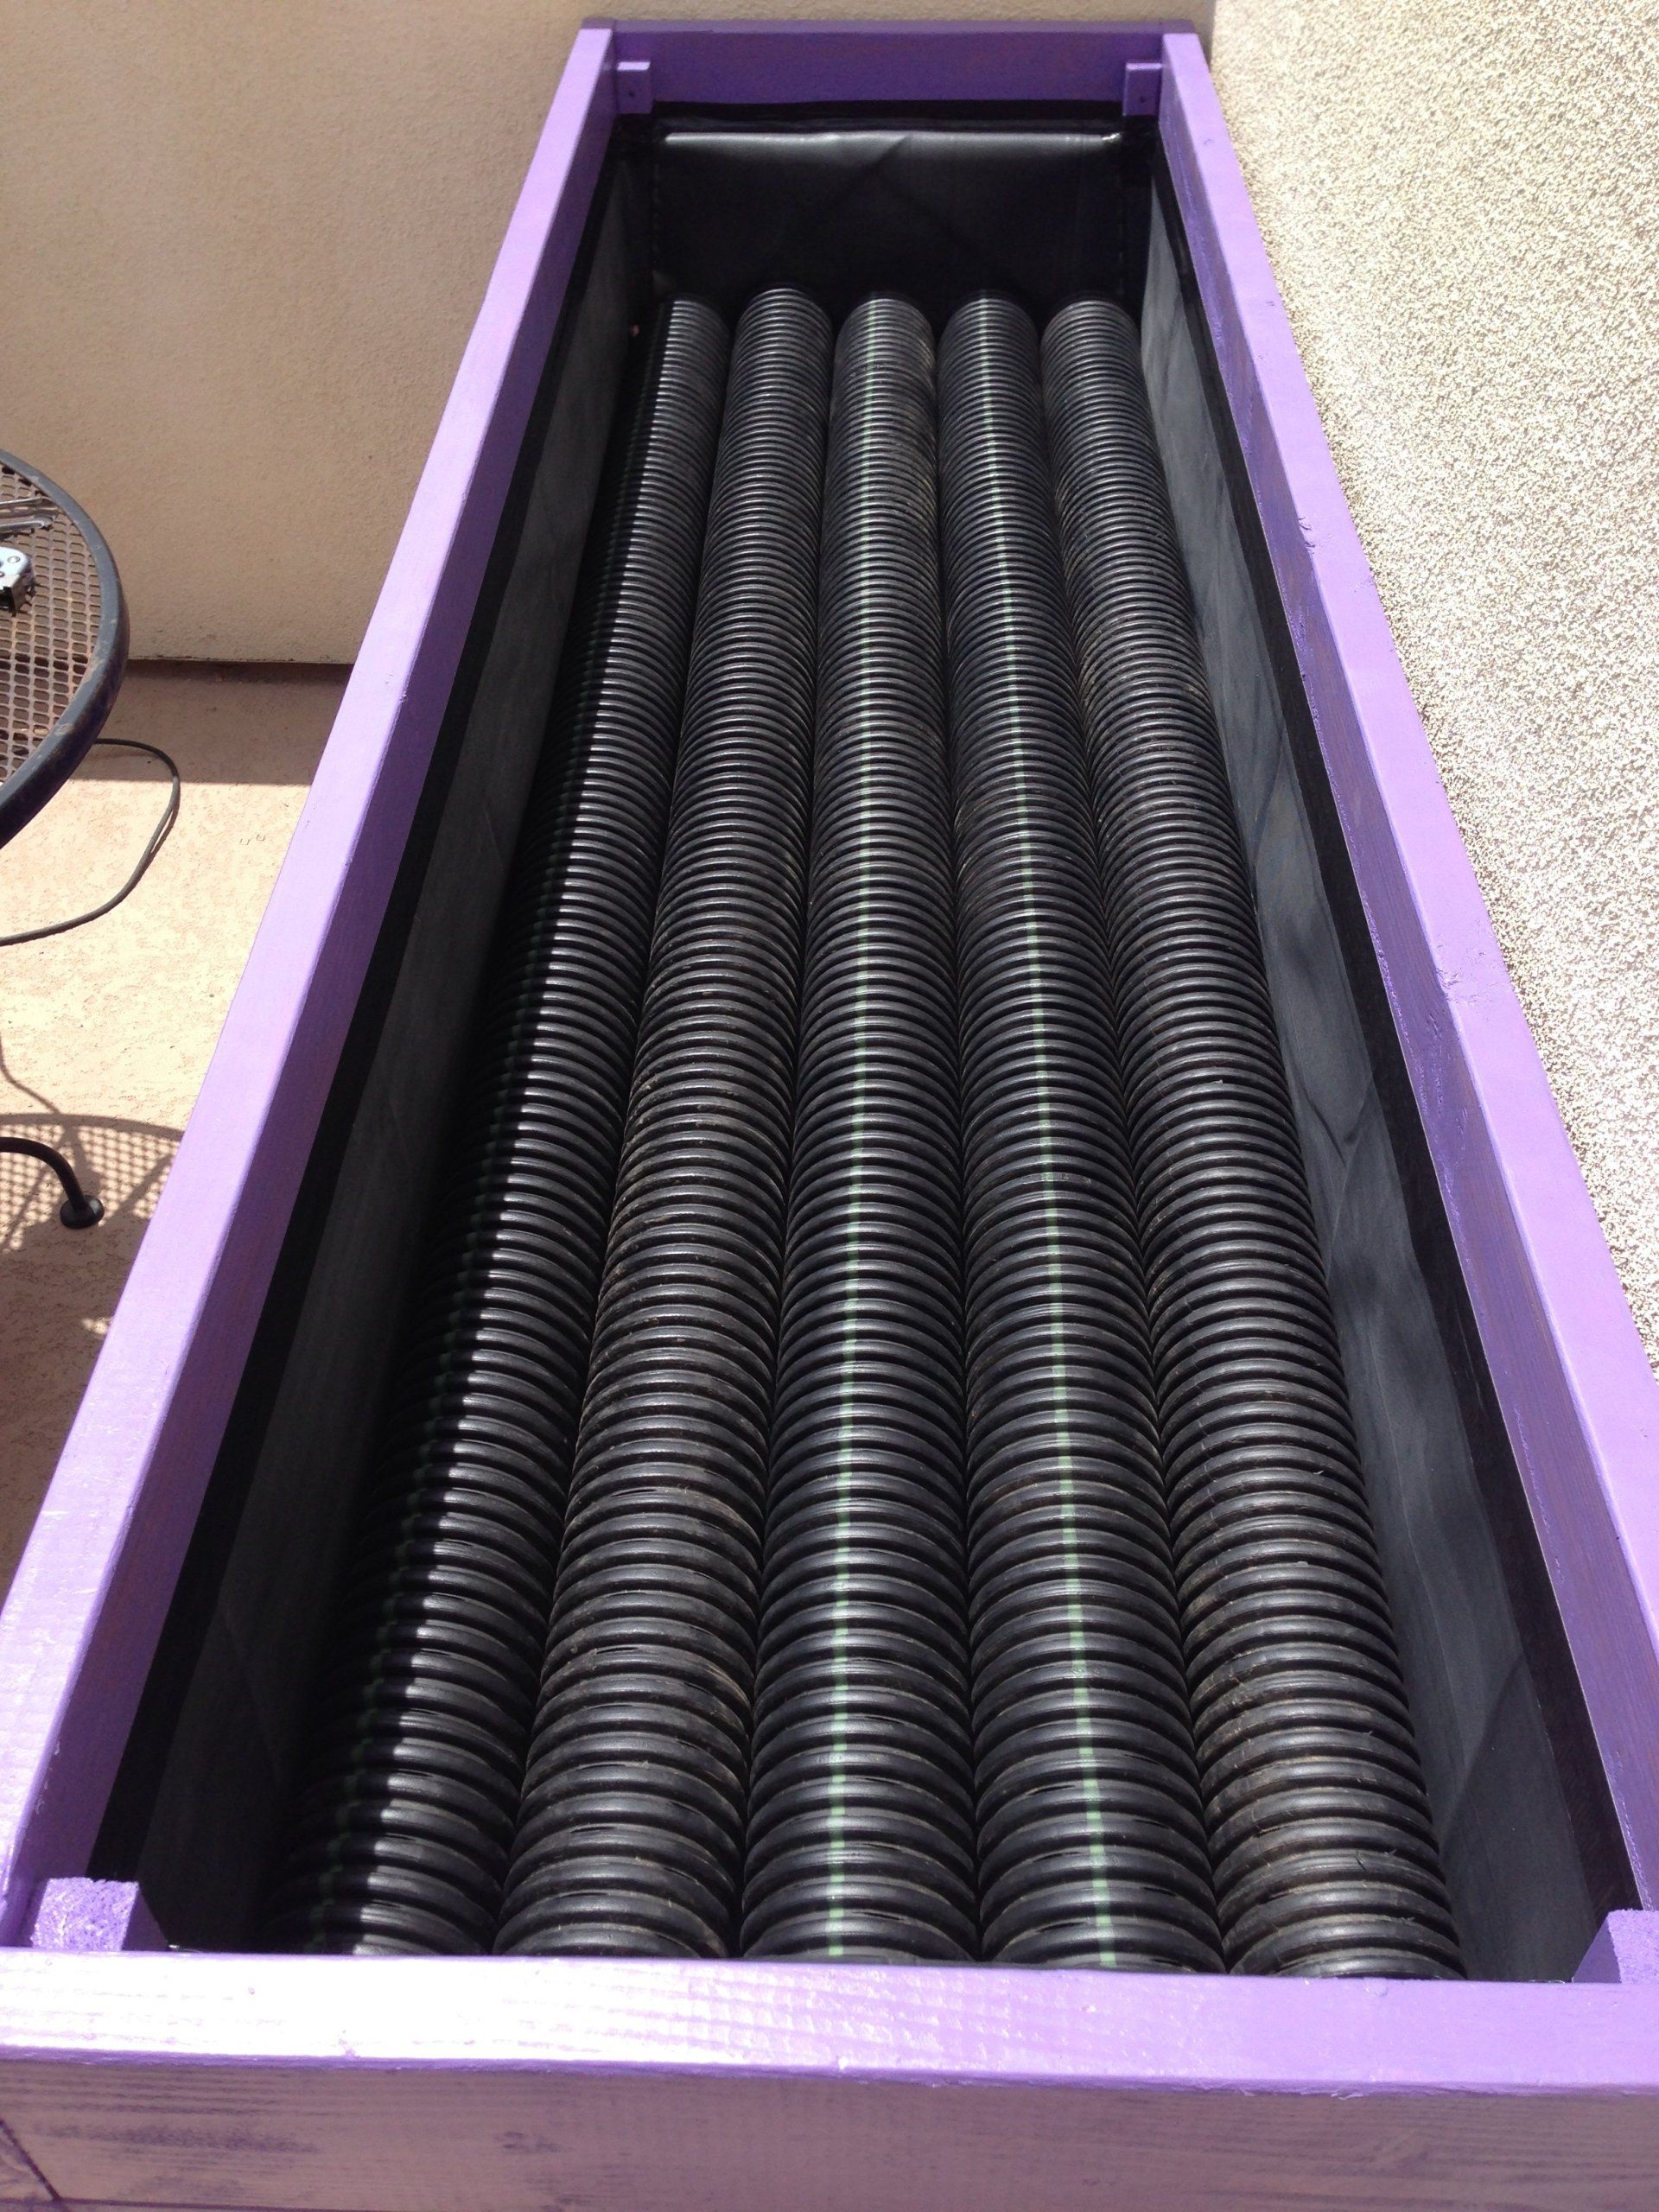
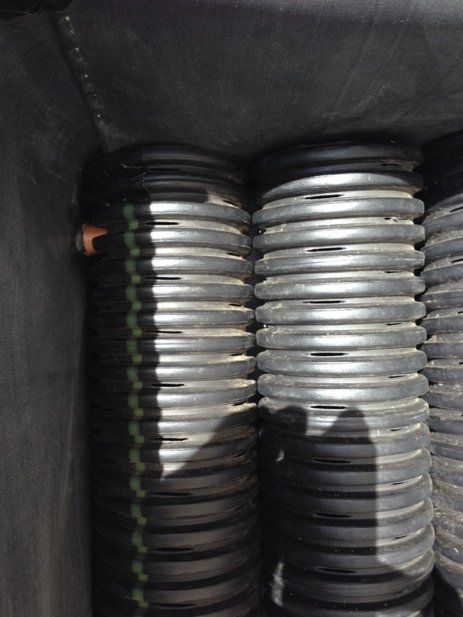
Self Watering Planter Box
April 27, 2021
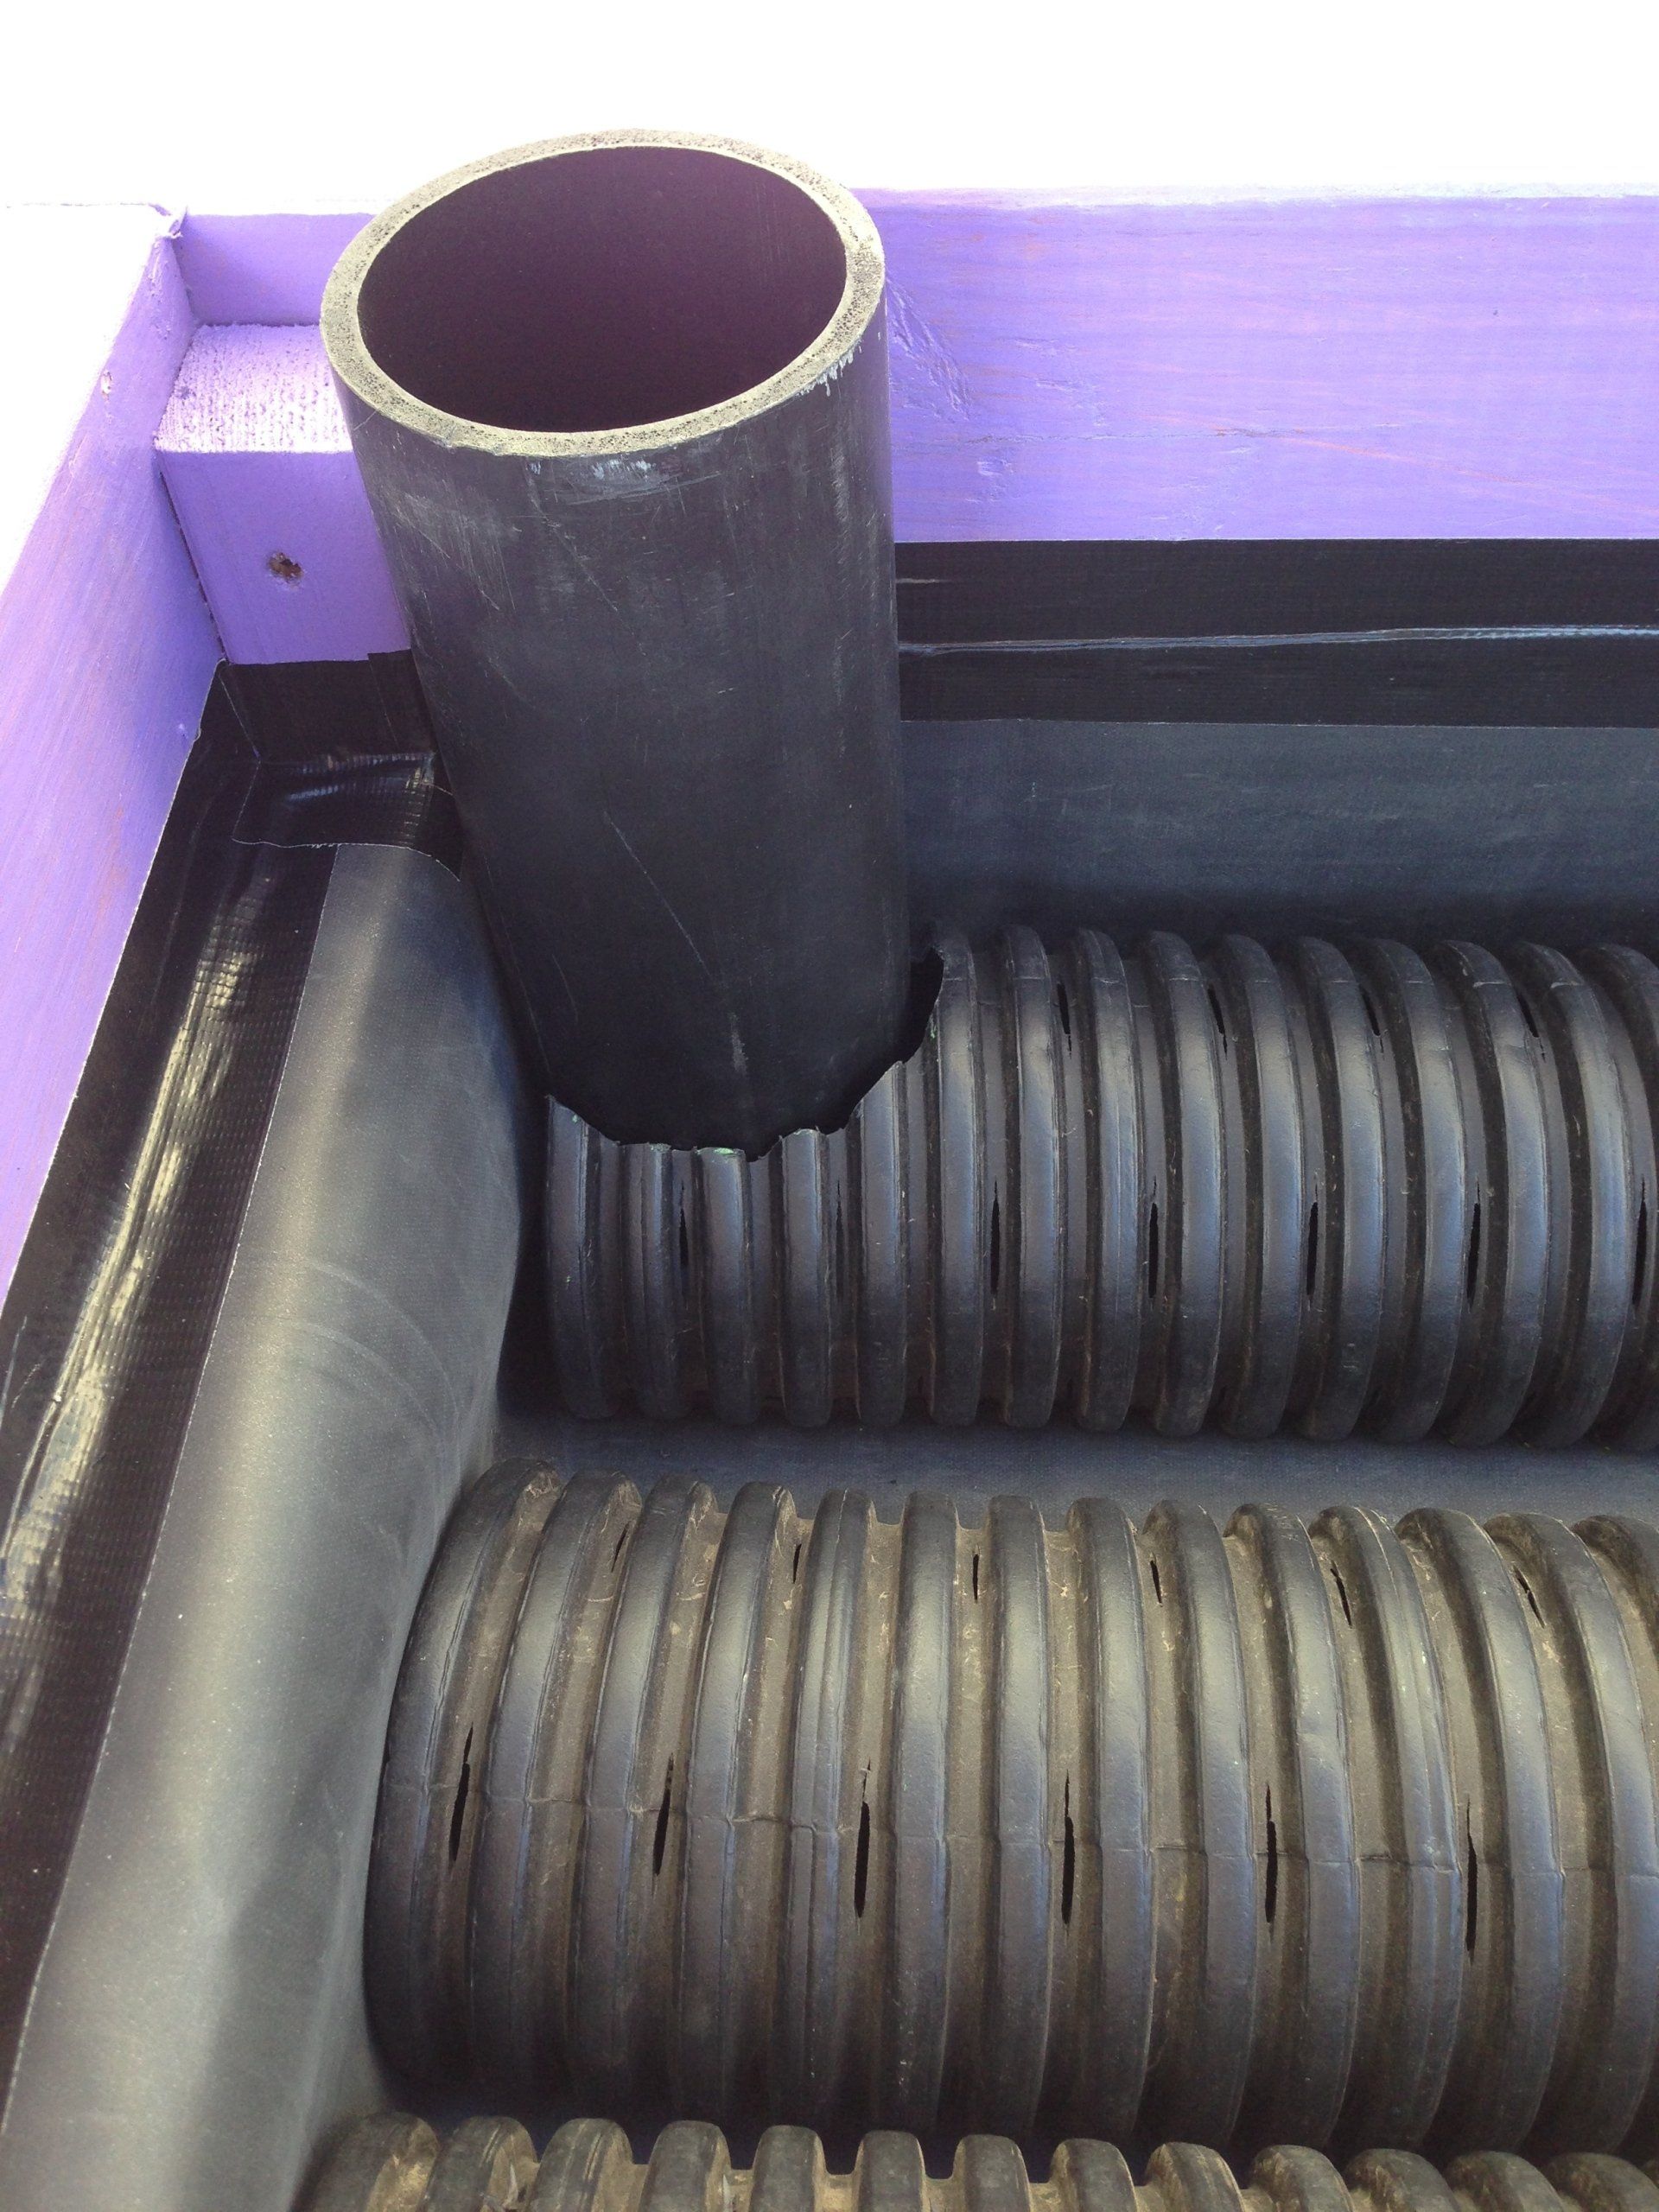
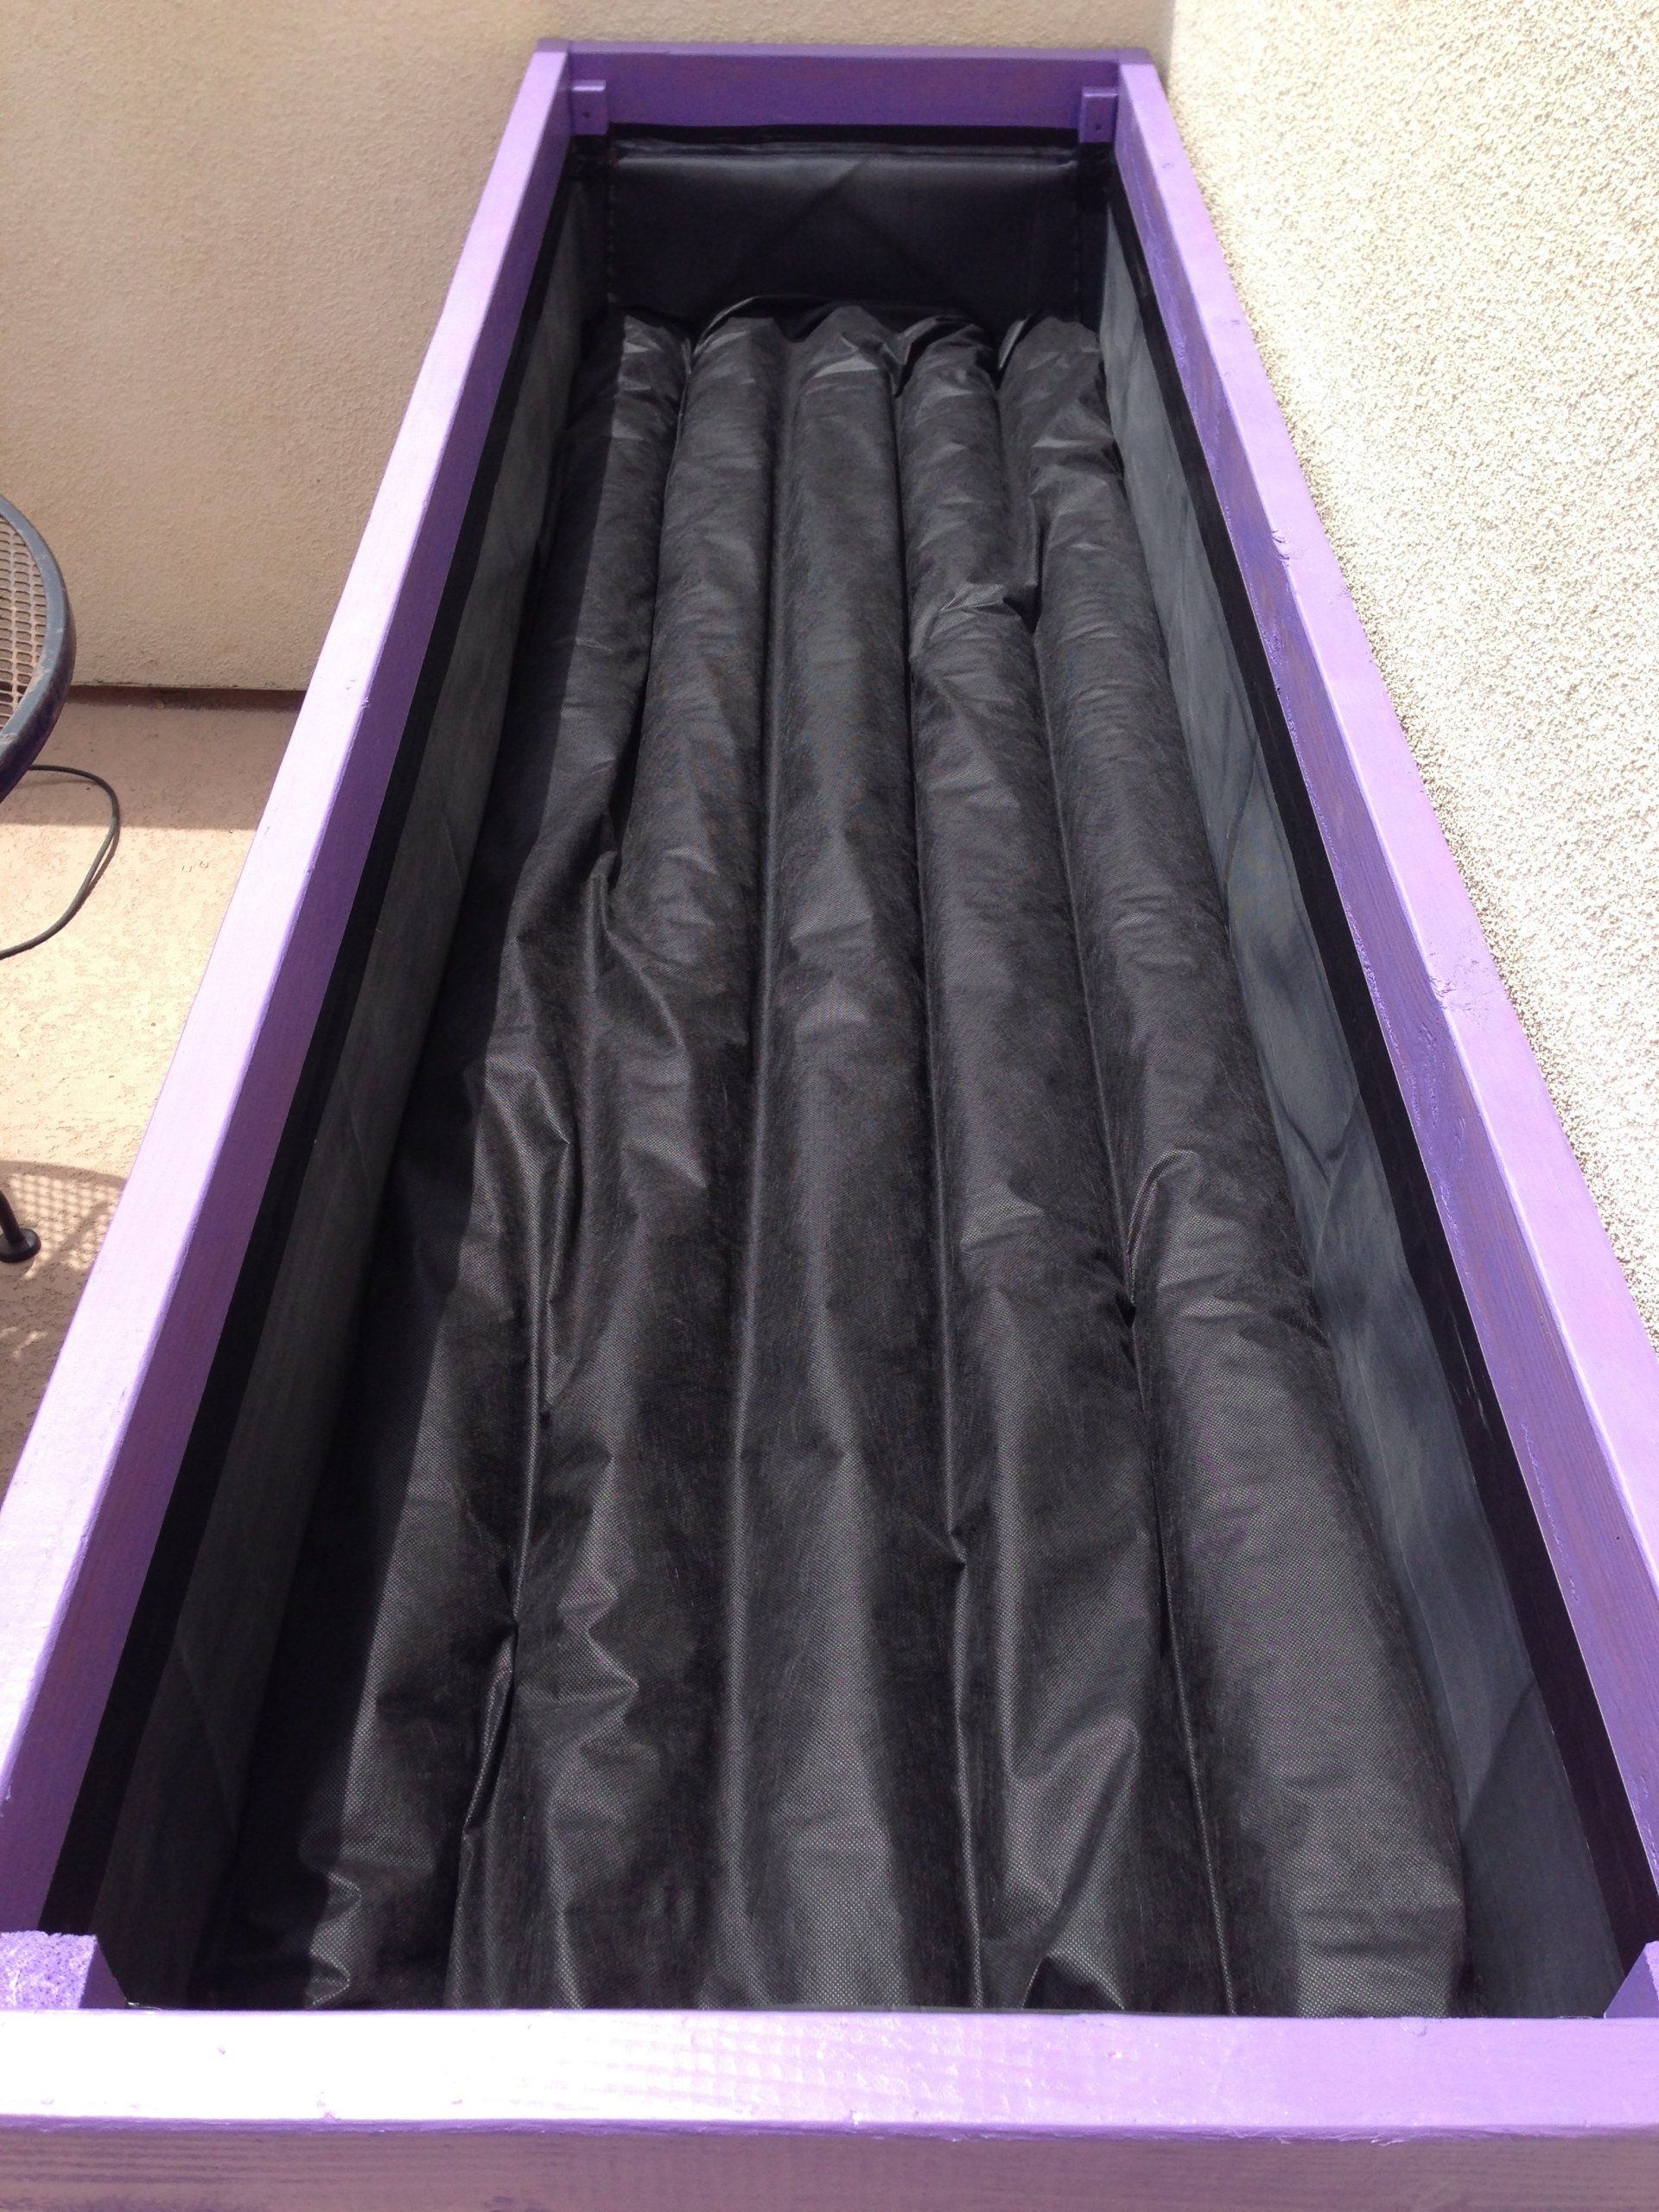
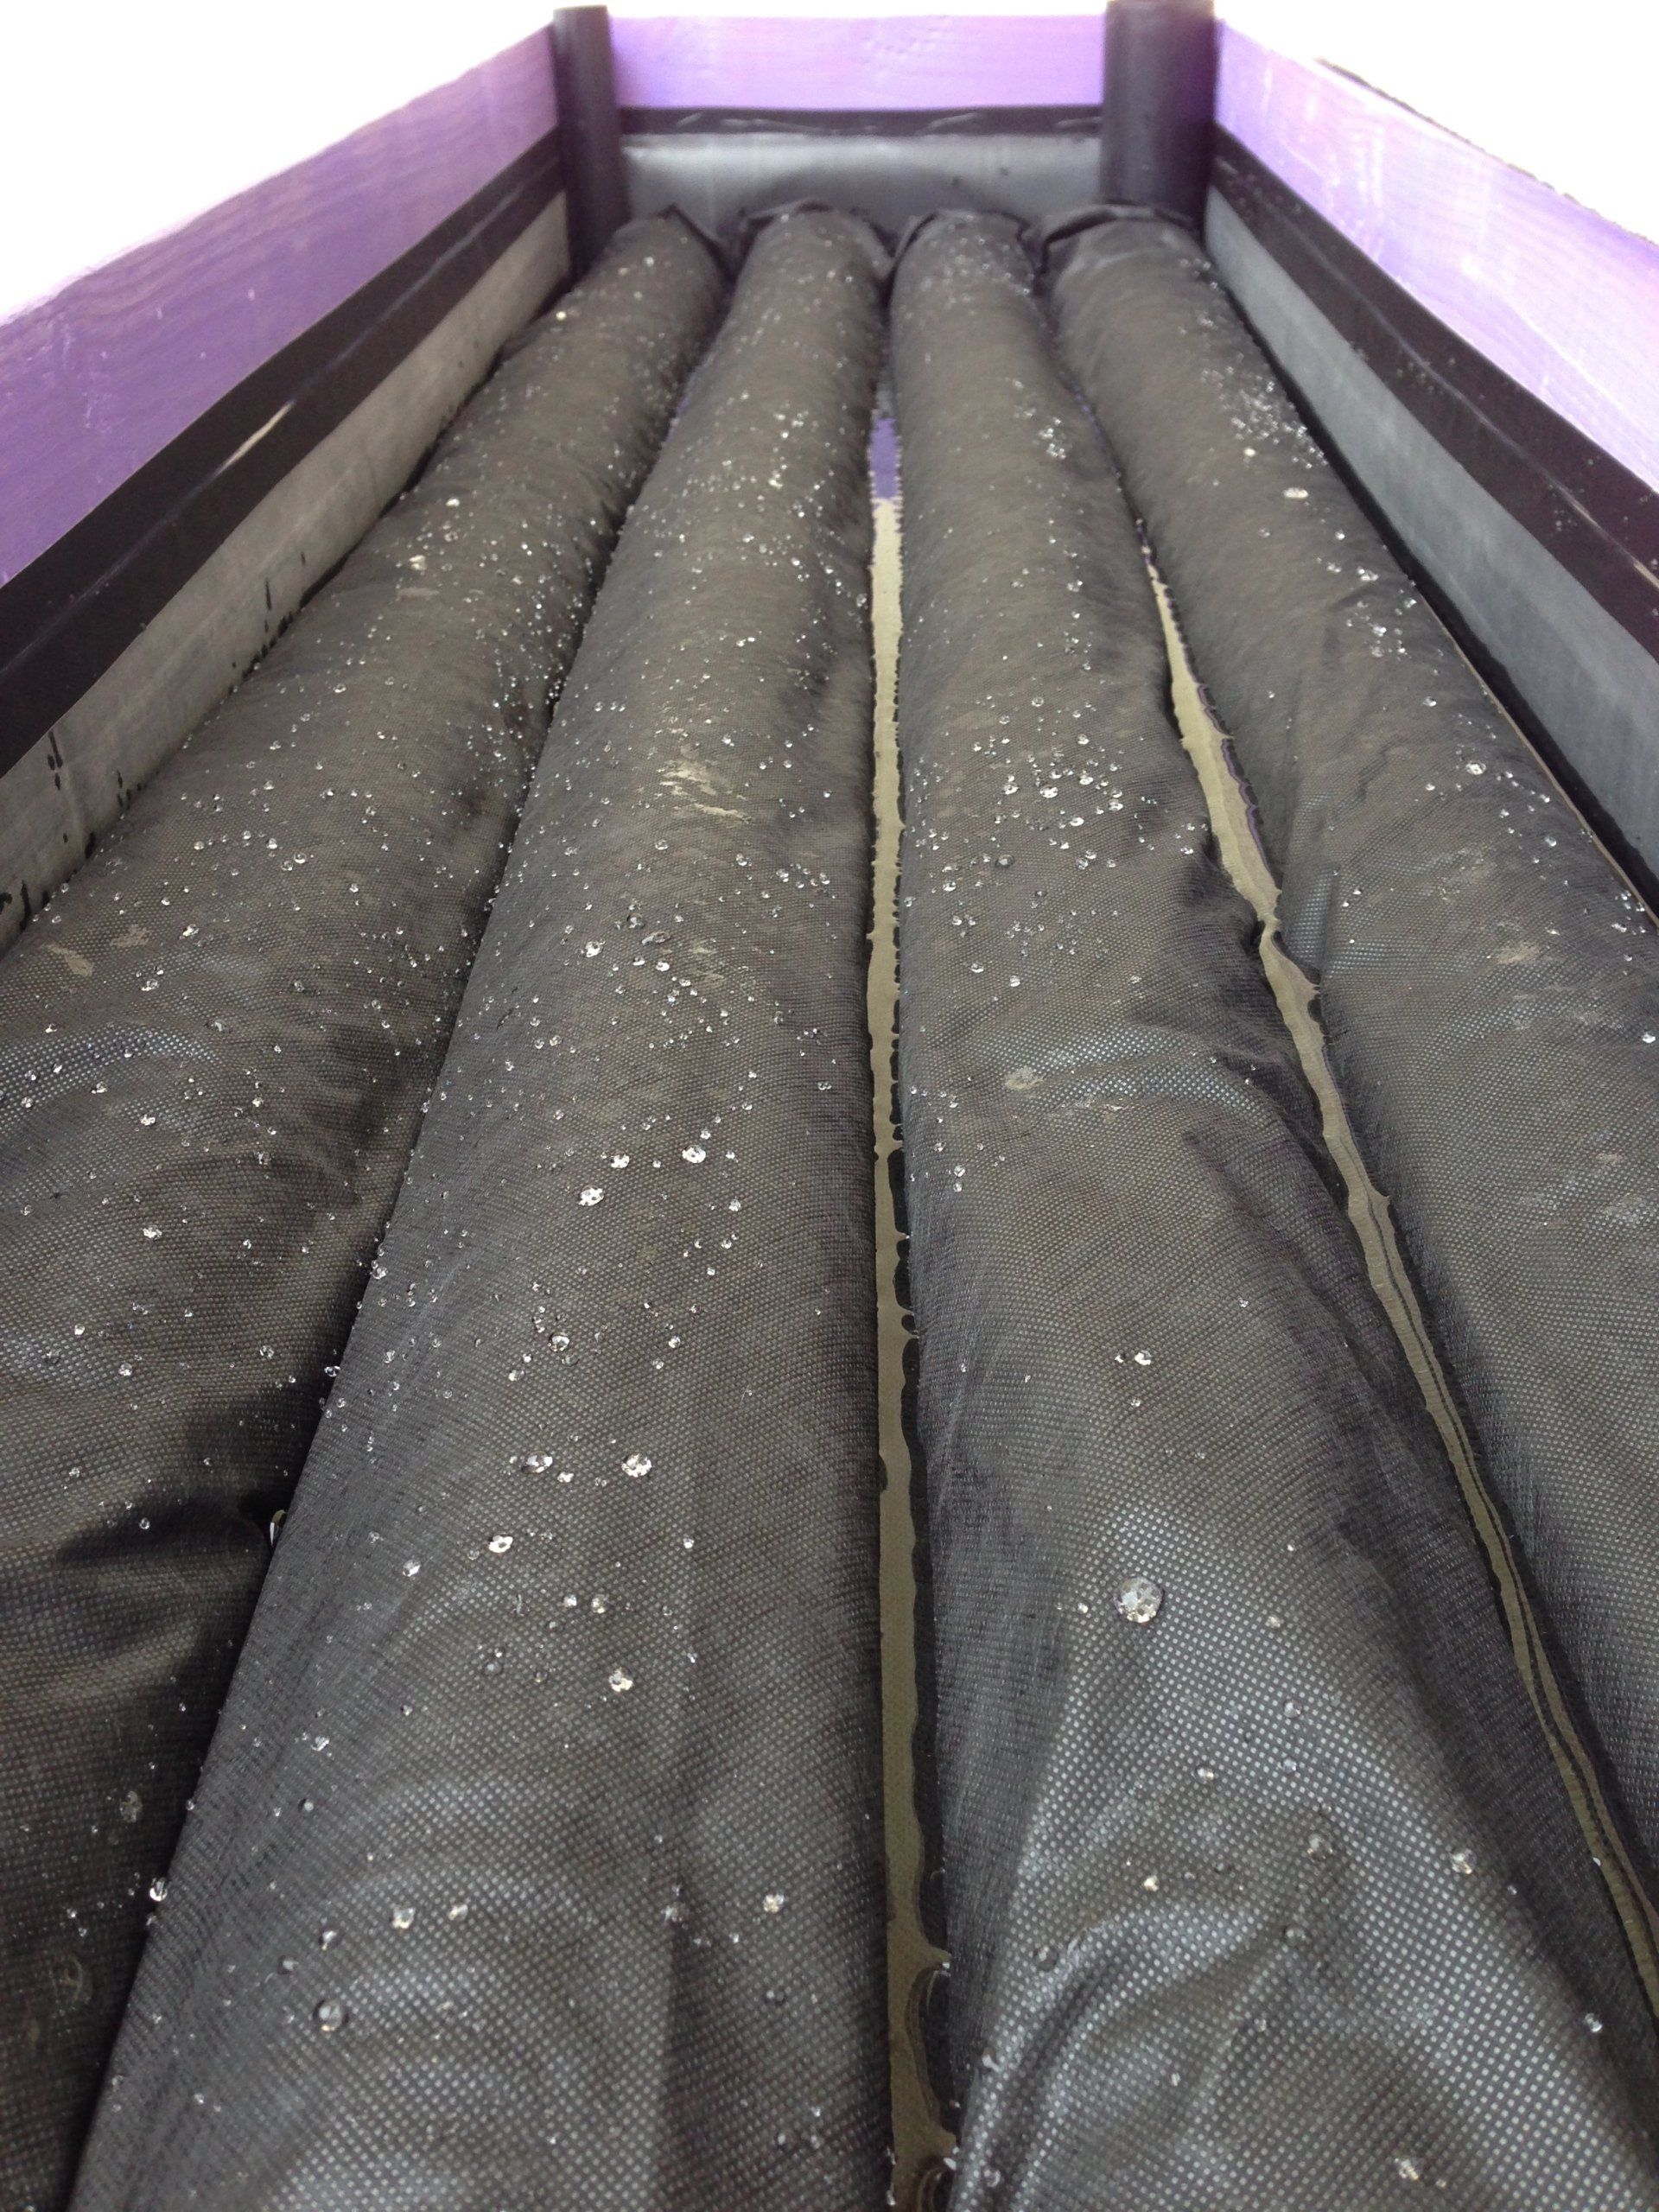
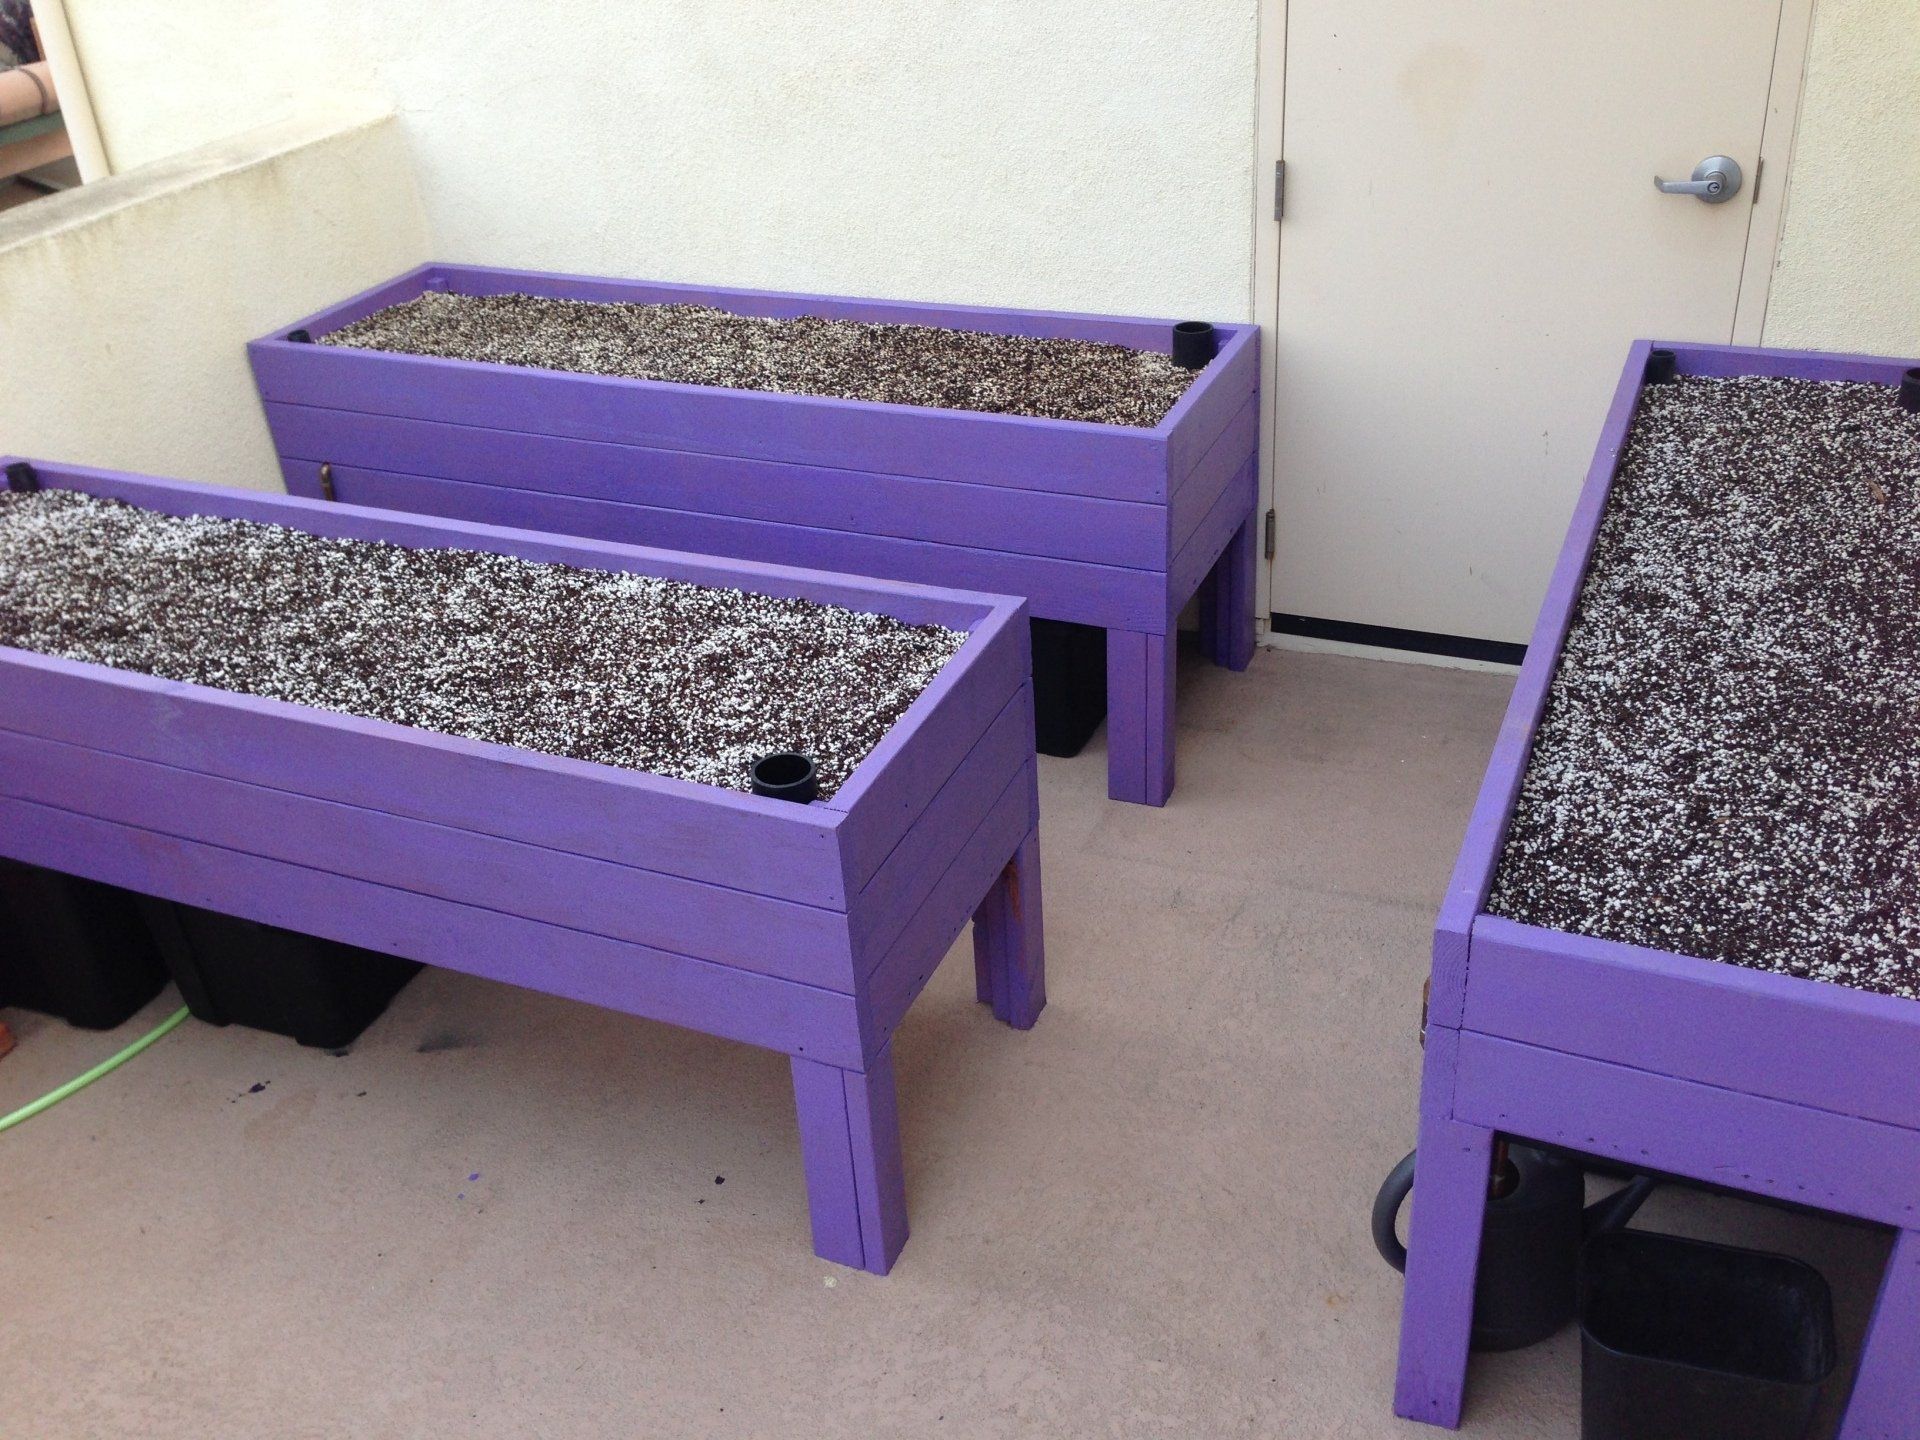
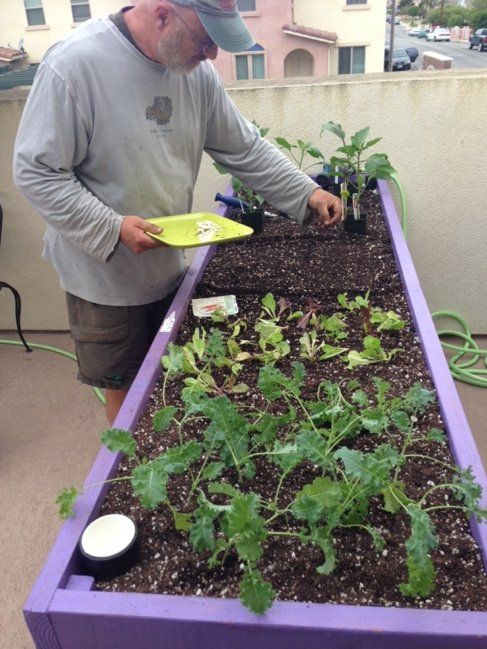
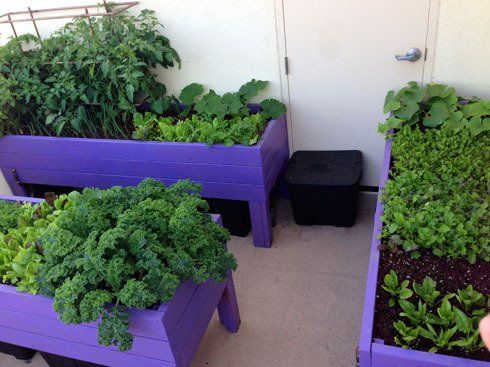
Raised planter boxes with a 3-inch-deep reservoir of water beneath 12 inches of soil (also known as sub-irrigated planters) make it easy to grow an abundance of vegetables in a small space, with minimal water and minimal effort. Once plants are established, they often only need watering once a month. With the main water source below the soil, plants grow deep roots, becoming more resistant to pests, and very unlikely to dry out if you forget to water for a few days or even weeks. The top inch of soil remains bone dry, so virtually no weeds germinate.


5 Ways Entrepreneurs Can Free Up Time for Self-Care Between answering emails, hosting meetings, and making progress on new projects, it can feel like entrepreneurship leaves you time for little else outside of work. If burnout is getting to you, you might be thinking about pursuing functional medicine treatments through Binkley Healing Center . But even busy small business owners can make time for self-care in their daily lives. With these tips, you’ll have more free time for self-care! Simplify Business Processes Sometimes, you don’t have to make dramatic changes in order to save time - instead, you can boost your efficiency just by simplifying your existing business processes. For example, if you’re interested in creating new products to provide passive income streams for your company, you may need to branch out by registering a “Doing Business As” name. By filing for a DBA, you can market and sell new offerings under a legitimate business name. Work Out at Home Even if you don’t have enough time to get to the gym, you can carve out short blocks of time in your schedule for home workouts. Everyday Health recommends following along with exercise videos produced by qualified personal trainers to avoid injury. You might feel more motivated to work out if you have cute new athletic wear! Shop for stylish workout clothes that allow for a wide range of movement. For example, you could buy yoga pants, breathable t-shirts, and supportive sports bras. Pick out bras that are comfortable - this means avoiding bras with underwire! You’ll also want to choose a pair of sneakers that fit you perfectly. Choose Helpful Software Technology can help boost your productivity so that you can get more done in a shorter period of time, leaving you with extra free time at the end of the workday. By investing in the right software, you’ll be able to speed up essential processes. Benchmark One recommends purchasing project management software and customer relationship management software. Tools like these will allow you to easily track all of your current projects as well as your sales and marketing data. Start Delegating Perhaps you’ve been hesitant to turn over certain important tasks to anyone else. Even if you have a few employees, you still feel like you need to manage or closely supervise most business processes. Getting comfortable with delegation is one of the best ways to save time during the workday - by entrusting qualified employees or contractors with time-consuming responsibilities, you can create more breathing room in your schedule. And if you’ve recognized that you need more help, you could consider hiring contractors or employees. Hiring someone new can take a while, so if you feel overwhelmed now, it’s time to start writing up job descriptions and sharing these openings on online job boards. Prep Your Meals Perhaps you’ve been trying to save time by ordering takeout or eating frozen dinners instead of cooking. While these options seem convenient, these habits aren’t particularly healthy. Instead, you could meal prep on the weekends and portion out home-cooked lunches and dinners to eat throughout the week. You’ll be able to enjoy a nutritious meal every night of the week, no matter how busy you were during the day. You can also stock up on healthy snacks that don’t require any cooking, like whole wheat crackers, nut butter, fruit, or vegetables and hummus. When you’re an entrepreneur, self-care can feel like a luxury. But ideally, self-care should simply be part of your normal routines. By implementing these ideas, you can take care of your business tasks with plenty of time left for self-care. Seeking holistic treatment for a health condition? You can turn to Binkley Healing Center! Text Dr. Binkley at 805-218-3939 today to make an appointment. Photo via Pexels

Vitamindcouncil.org is the best source of information about all the important functions of Vitamin D, on nearly every organ and system in the body. Dr. John Cannell regularly posts new research studies there from all over the world. Vitamin D is essential for your immune system to work at its peak. The immune system has two modes, breakdown and rebuild. Vitamin D is required for it to switch efficiently from one to the other. When you have adequate Vitamin D, colds and flus are rare, and mild. The proper dose for adults is now 5000 IU per day. The paltry 400-600 IU recommended by US government is merely enough to prevent rickets. Unfortunately, there aren’t any significant dietary sources of Vitamin D. A glass of milk has only 100 IU. Fifty glasses of milk a day, anyone? Our bodies are designed to make Vitamin D in our skin. To get adequate amounts, you need to expose your torso (not just your arms and legs) to the sun for about 20 minutes (half the time it takes you to turn pink), three times a week, with no sunscreen. And in the US, this will only work in the spring, summer and fall. There aren’t enough UVB rays in the winter, even in California. The only way to know that you’re getting enough is to do a blood test. Most doctors will order this for you. The reference range used by most physicians was recently raised from 20 to 32 ng/ml. This is still too low. Current research shows that the healthy range is 50-80 ng/ml. People who live near the equator, and spend time outdoors (without a shirt on) have this level in their blood. They also have very low rates of heart disease, diabetes, depression, dementia, breast, prostate and colorectal cancer, and many other conditions that are common elsewhere. Nearly everyone in the industrialized world tests far below the healthy range, unless they take 5000 IU daily. Call our office if you’d like us to order the blood test for you. It’s $40, and can be done at any one of thousands of LabCorp draw sites around the country.
A lot of people have chronic pain and think that they don’t. They say things like: “It comes and it goes, but it’s not chronic.” Or: “No, it’s not chronic. I only feel it when it’s about to rain, or when I climb stairs.” The word chronic, like chronicle and chronology, comes from khronos, Greek for ‘time’. Chronic does not mean ‘continuous’ or ‘unrelenting’. Chronic pain usually comes and goes. Chronic does not mean intense. Chronic pain can be mild, moderate or severe. If you experience pain in any part of your body, that lasts––continuously or intermittently––for more than a few days or weeks, you have chronic pain. If the pain goes away for months or years, then comes back, to the same part of your body––even if it feels different, i.e. more or less intense, more or less localized, even ‘like nothing you’ve ever felt before’––if it’s in the same part of your body, it’s chronic. This means that however irregular, infrequent, or situation dependent your pain is, the cause is probably the same. And that cause is probably always there, even when you feel perfectly fine. Dr. Binkley can identify the underlying causes of nearly anything ails you, and offer solutions that give both quick relief, and lasting results.
The two most common causes of knee problems are short tight quadriceps and short tight hip rotators. These are also the most commonly overlooked causes of knee pain. If you go to an orthopedist with knee pain, chances are her examination will be limited to the joints and ligaments of the knee. She’ll look for damage that’s bad enough to warrant surgery––to a meniscus, or a collateral or cruciate or patellar ligament. Some people are frightened at the thought going under the knife. Others are attracted to the specificity and finality of surgery. A physical therapist will typically look at both the joints and the muscles impacting the knee. His treatment will usually be focused on identifying weak muscles and strengthening them. Some mild stretching may also be included. Surgically repairing damaged joint tissue without removing the excessive and chronically imbalanced loads that created that damage in the first place, is a temporary fix––and it can create debilitating and irreversible scar tissue. Strength training, though useful, often reinforces and exacerbates common muscle imbalances. In contrast, Dr. Binkley focuses on identifying and lengthening the short tight muscles that debilitate the knee. Lengthening is nearly always far more important than strengthening. The quadriceps and hip rotators frequently become short and tight from nothing more than sitting for prolonged periods––at a desk, in a car, in meetings, on a plane––many of us spend most of our days sitting in chairs. Short tight quadriceps turn your knee into a tightly-sprung nutcracker, which constantly overloads the meniscus inside. Short tight hip rotators, especially the piriformis, cause your knee to be slightly twisted all the time, leading to unbalanced forces that traumatize the knee joints and ligaments. Typically, years of damage will occur before you feel the first hint of pain. Specific individualized therapy and instruction in alignment-based yoga stretches can lengthen short tight muscles, and remove excessive chronic unbalanced loads from the knee joints, allowing them (finally, you’ve given them a chance!) to fully heal. Additionally, special techniques to help your brain reset chronically hypersensitive nerves can often quickly eliminate pain that has persisted or recurred for years. You may not have to “live with it.” If you think you’ve “tried everything,” and you haven’t been to Binkley Healing Center, you owe it to yourself to experience firsthand what Dr. Binkley can do. It could change your life.
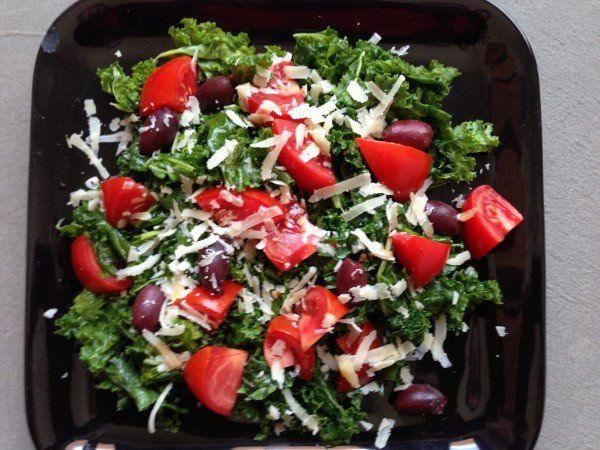
Kale is one of the most nutritious vegetables. Its leaves are a superfood, full of vitamins and minerals. It isn’t on the top of everyone’s favorite food list, perhaps because not everyone knows how to prepare it. Here’s one way to make a simple delicious kale salad: 1. Pull the leaves off the stems, place stems in compost bin. 2. Put leaves in large bowl with coarse-ground sea salt, approximately one pinch per bunch of kale. Macerate (crush) to break down tough fibers and release nutrients. You can do this with your hands, or if it’s especially tough, you could use a muddling stick, rolling pin, you could even put it in a (reusable) bag and stomp on it! 3. Add the juice of one lemon per bunch of kale, and refrigerate overnight. You could eat it immediately, of course. It depends on how tough the kale is, and how much you like to chew. If you want more flavor and easier chewing, leave it overnight. 4. Add olive oil, toss (with clean fingers is fastest) to evenly coat the leaves. 5. Top with Kalamata olives, tomatoes, shaved parmesan, nuts, seeds, roasted peppers, or anything else you like. Bon appétit!

veryone knows that water is essential for life. Most don’t know that when it comes to thirst, the body’s normal feedback mechanisms, can and very often do fail. You can be significantly dehydrated and still not be thirsty. A great way to increase your intake is to make your water taste better. Everyone has had water with lemon. Some have had water with cucumber. Relatively few have added a few drops of good liquid stevia extract* to make their water taste great. I say, try all three! When you deprive your body of optimal hydration for long periods of time, it shifts into conservation mode. Until you convince it that abundant fluid will once again become reliable, your body will withhold water from your skin, hair, joints, lungs, even your brain and other vital organs. The only really essential functions are to keep your blood pressure up, and keep basic nutrients flowing to keep you alive. Most people should drink about half their body weight in ounces, or two to three quarts (or liters) per day. When you force yourself to drink more than you have been, you will have to go to the bathroom more often. But only for a few weeks. Once your body readjusts to a steady supply, you will use more water for basic functions. More water will circulate through every cell in your body, including your brain, making you feel sharper and more focused. More water will moisten your mucous membranes, sinuses, and digestive tract. More water will be expelled every time you exhale. More water will evaporate through your well-hydrated skin. After a few weeks of increasing your water intake, you’ll no longer need to empty your bladder any more than before, because your body will once again be using more water, everyday; keeping you healthy and vibrant. *The healthiest and best tasting stevia is Stevita brand liquid, from Brazil. It’s available at health food stores, and on amazon.com. NOTE: “Truvia” is not stevia: http://www.brucebradley.com/food/truvia-honestly-sweet-or-dishonestly-marketed/

…with the thinnest, crunchiest crust ever. And it’s gluten-free! Forget about trying to make your own dough. Just pick up a package of brown rice tortillas at Trader Joe’s (really). Bake the tortilla (at 350) for about five minutes (till it stiffens). It turns into a 12-inch super-thin cracker. Add your favorite toppings, and lots of shredded (hopefully organic) mozzarella. Bake for 5 more minutes, or till the cheese melts.
A disc in the spine, neck or back, is a cushion between the vertebrae, that is like a thick slice of an onion, made out of cartilage, with a jelly-bean-like center. This cartilage is firmly attached to the vertebrae above and below it, so it cannot ‘slip’. The jelly bean in the center is as hard as a marble when fully supported by the strong rings of cartilage that surround it. But if small or large tears occur in these supportive rings of cartilage, the jelly bean center gets squeezed into the void, causing the outer rings to bulge.
What do you resist throughout the day? Traffic? The weather? The thoughts and actions of other people you love? The thoughts and actions of other people you’ve never met? I find myself resisting all of the above on a regular basis. I resist clocks––time should definitely stop passing so quickly! And yet pass it does. At about the same rate every day. Resistance is exhausting. But its wearying tendency often goes unnoticed, for years. Resisting the inevitable, things over which we have no control whatsoever, is one of the popular forms of stress around. Opportunities for resisting life surround us everyday. It’s two most important attributes, however, are often ignored: 1. Resistance is optional. You have to choose to resist something. 2. Resistance is deadly. The stress of resistance causes high blood pressure and increased free radical production. It compromises gastrointestinal function. It weakens the immune system, and ramps up the inflammatory process that drives every chronic disease known to man. Whatever we resist, will persist. Make conscious whatever you choose to resist, and choose carefully. Live Long… NOTE : This post was inspired by a course I recently took called Communication – Access to Power , through Landmark Worldwide .
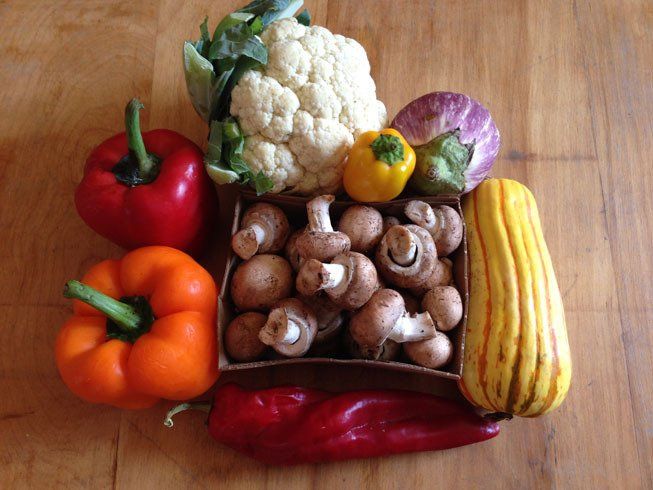
Here’s my favorite way to simplify the otherwise seemingly overwhelmingly complex process of preparing what should be the most important part of your diet: fresh delicious vegetables. 1. Get veggies––preferably local––from farmer’s market, a co-op, or your neighbor’s garden. Try to always include something red (tomatoes, peppers, cherries, cranberries), something white (zucchini, eggplant, cauliflower, onions, fennel) something green (spinach, broccoli, zucchini, peppers, basil, dill, arugula, leeks, celery) something yellow or orange (bell peppers, carrots, squash) and something brownish (mushrooms, nuts, kalamata olives). Arrange these beautifully, then photograph and post them to facebook to impress your friends.